If your outdoor photos look soft, the problem is usually not your camera. I have missed sharp shots in beautiful light because my shutter was too slow, my focus point was lazy, or my body was moving more than I noticed.
Learning how to take sharp photos in natural light means controlling three things at once: camera settings, light direction, and stability. Once those work together, your photos look cleaner before editing even begins.
Why Natural-Light Photos Look Soft Even When Focus Seems Right
Natural light changes quickly. A cloud moves, your subject turns, a bird jumps, or your hand shifts slightly. Any of these can soften a photo.
Sharpness also depends on contrast. Flat light can make a focused image look dull. Harsh light can hide detail in deep shadows. That is why I do not judge sharpness only by the focus box. I check the eye, fine hair, feather texture, fabric edges, and small highlights.
A sharp photo usually has a clear focus point, enough shutter speed, good lens performance, and clean light across the subject.
Start With the Sharpness Stack, Not One Magic Setting
There is no single setting that fixes every natural-light image. I use a stack instead. First, I set shutter speed for movement. Then I choose aperture for depth and lens clarity. After that, I adjust ISO only as much as needed.
Use a Shutter Speed That Matches the Subject
For handheld shots, I start with the reciprocal rule. If I use a 100mm lens, I avoid going slower than 1/100s. With a 200mm lens, I start near 1/200s or faster.
For portraits in natural light, I often use 1/250s to 1/500s. That keeps small head movements sharp. For wildlife, I go much faster. A calm deer may need 1/1000s. A flying bird may need 1/2000s or 1/3200s.
Fast shutter speed matters because motion blur cannot be fully repaired later. Editing can add contrast, but it cannot rebuild lost feather or eyelash detail.
Keep ISO Low, But Do Not Fear Raising It
In bright outdoor light, ISO 100 to 400 gives clean detail. Lower ISO protects fine texture because it reduces visible noise.
Still, I would rather use ISO 800 than shoot a moving subject at a shutter speed that is too slow. A slightly noisy sharp photo is more useful than a clean blurry one. Modern editing tools handle noise better than motion blur.
Find Your Lens Sweet Spot
Most lenses are not their sharpest wide open. A lens at f/1.8 may give lovely blur, but the focus plane is thin. One eye may be sharp while the other falls soft.
For reliable clarity, I often stop down to f/4, f/5.6, or f/8. These apertures improve edge detail and give more depth across the frame. For landscapes, f/8 is often a strong starting point. For portraits, f/4 gives a useful balance between sharpness and background separation.
Nail Focus Before You Blame the Light
Many soft photos happen because the camera focused on the wrong detail. Grass, branches, noses, and shirt collars can trick autofocus.
Use Single-Point Autofocus for Still Subjects
For portraits, flowers, products, and still scenes, I use single-point autofocus. I place the focus point exactly where I want sharpness.
For people, that usually means the nearest eye. For food, it may be the front edge of the hero ingredient. For landscapes, it may be a clear detail about one-third into the scene.
This gives me control. I do not want the camera guessing.
Use Continuous Autofocus for Wildlife and Action
For moving subjects, I switch to continuous autofocus. Canon calls this AI Servo. Nikon and Sony often call it AF-C.
This mode updates focus as the subject moves closer or farther away. It is essential for wildlife, sports, pets, and kids running through natural light.
I also use burst mode for action. A short burst gives me several frames. Usually, one frame has the best pose, cleanest eye, and least motion.
Focus on the Eye When Photographing People or Animals
Eyes decide whether a photo feels sharp. If the eye is soft, the image feels soft.
When my camera has eye detection, I turn it on. For wildlife, animal eye tracking can help lock focus on the most important point. It is not perfect, so I still check the result at 100% zoom.
For birds in branches, I avoid letting autofocus grab twigs in front of the subject. I use a smaller focus area and wait for a clean gap.
Use Natural Light Like a Sharpness Tool
Light can make a sharp image look sharper. It can also make a technically sharp image look muddy.
Shoot in Open Shade for Clean Detail
Open shade is one of my favorite natural-light setups. I place the subject in shade near a bright area, such as beside a wall, porch, tree line, or building edge.
This creates soft, even light without harsh patches. Skin texture, fur, fabric, and product details appear cleaner. It also reduces squinting and blown highlights.
Avoid Harsh Midday Overhead Sun
Midday sun creates strong shadows under eyes, noses, leaves, and feathers. Those shadows can hide detail and confuse exposure.
If I must shoot at noon, I look for shade, turn the subject away from direct sun, or use a reflector. I avoid placing people under patchy tree light because the bright spots can look messy.
Add Direction With Backlight or Side Light
Flat light can make an image look less crisp. A 45-degree side angle adds shape and texture. Backlight can create glow around hair, fur, or feathers.
For wildlife, I often prefer the sun behind me or slightly to the side. That gives the subject enough light for a fast shutter speed. It also creates catchlights in the eyes, which makes the image feel alive.
Stabilize Your Camera Before Pressing the Shutter
Sharpness is physical. Your stance, grip, breathing, and support all matter.
Brace Your Body for Handheld Shots
When I shoot handheld, I tuck my elbows into my ribs. I support the lens from underneath. I exhale slowly and roll my finger over the shutter instead of stabbing it.
With telephoto lenses, I widen my stance and lean against a tree, wall, fence, or car when possible. Small body movements become huge at long focal lengths.
Use a Tripod, Monopod, or Gimbal When Needed
For landscapes, still-life scenes, and low-light natural portraits, I use a tripod. I also use a 2-second timer so my finger does not shake the camera.
For wildlife, a tripod can be too slow. A monopod gives support while keeping me mobile. For heavy lenses, a gimbal head helps track animals smoothly.
Turn on image stabilization when shooting handheld. If you are panning, use the lens mode designed for panning or sport movement when available.
My Natural-Light Sharpness Test: Portrait vs Wildlife Settings
Here is a real-world way I approach how to take sharp photos in natural light without overthinking.
For a shaded outdoor portrait, I start at 1/500s, f/4, ISO 200, single-point autofocus, and focus on the nearest eye. If the light drops, I raise ISO before lowering shutter speed too much.
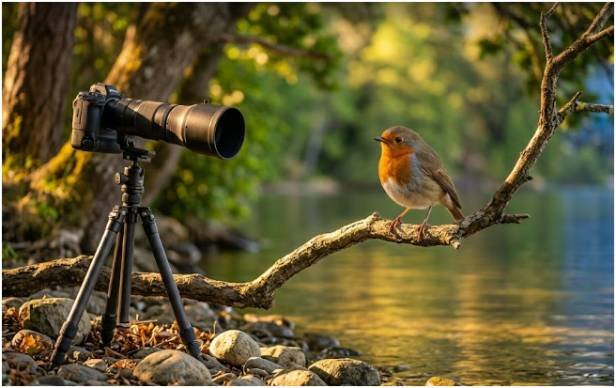
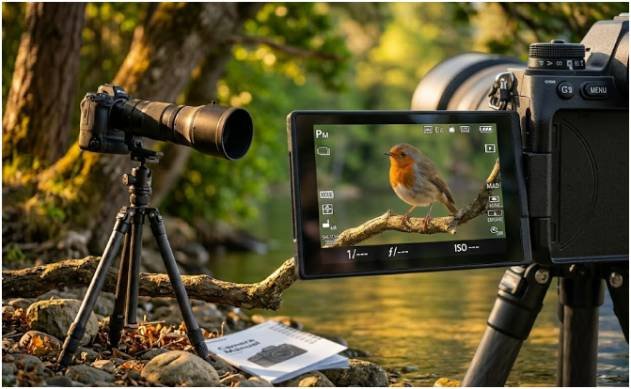
For a bird on a branch, I start at 1/2000s, f/5.6, ISO 800, continuous autofocus, animal eye detection, and burst mode. If the bird starts flying, I push toward 1/3200s.
The lesson is simple. Portraits need precision. Wildlife needs speed. Both need clean light and steady handling.
Composition Still Affects Perceived Sharpness
A sharp subject can still feel weak if the frame is cluttered. Good composition helps the viewer find the sharpest detail faster.
Place the main subject where the eye naturally lands. Leave breathing room in the direction of movement. Avoid bright distractions near the edges.
If you are still building your composition skills, study rule of thirds photography tips for beginners before your next shoot. Better framing makes your sharpest details stand out.
Common Mistakes That Make Natural-Light Photos Look Blurry
The biggest mistake is using a shutter speed that is too slow for the lens or subject. The second is shooting wide open when you need more depth. The third is letting autofocus choose the subject.
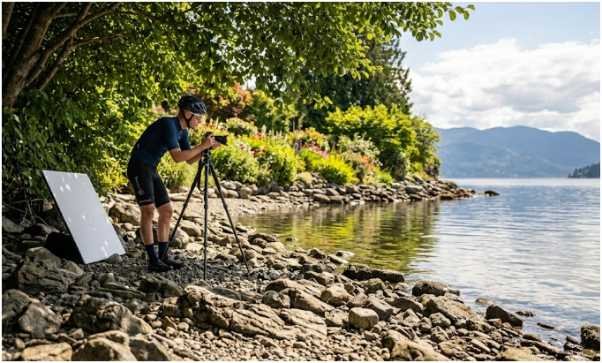
I also see beginners underuse reflectors. A simple white board can brighten shadows and help the camera hold focus. Another common issue is checking sharpness only on the camera screen. Always zoom in and inspect the eye or finest detail.
Dirty lenses can also reduce contrast. Before outdoor shoots, I clean the front element and check for fingerprints. It takes seconds and saves images.
FAQs About Taking Sharp Photos in Natural Light
1. What is the best shutter speed for sharp natural-light photos?
Use at least 1/250s for portraits, 1/1000s for slow wildlife, and 1/2000s or faster for birds or action.
2. What aperture gives the sharpest outdoor photos?
Most lenses sharpen well around f/4, f/5.6, or f/8, depending on the subject and background.
3. How do I take sharp wildlife photos in natural light?
Use fast shutter speed, continuous autofocus, burst mode, animal eye tracking, and stable telephoto support.
4. Why are my natural-light photos not sharp?
Your shutter may be too slow, focus may hit the wrong spot, ISO may be too high, or the light may be too harsh.
Sharp Photos Do Not Happen by Accident
Once I understood how to take sharp photos in natural light, I stopped blaming my camera so often. Sharpness came from better decisions before I pressed the shutter.
Set your shutter for the subject. Use the lens sweet spot. Focus with intention. Find clean light. Brace your body. Then take the shot.
Your next sharp photo is probably not hiding in a new camera. It is waiting in your next setting change.