
You do not need a studio, a fancy lens, or a photography degree to take better pictures. The fastest improvement usually comes from changing how you frame, light, and time the shot.
I learned this the hard way after blaming my camera for dull photos. Most of the problem was not gear. It was messy backgrounds, harsh light, shaky hands, and standing in the same boring position every time. These easy photography tips for non professional photographers will help you fix those mistakes with any smartphone, DSLR, or beginner camera.
Why Better Photos Start Before You Press the Button
Most beginners think photography starts with the shutter button. It starts a few seconds earlier.
Before I take a photo now, I ask three quick questions. What is the main subject? Where is the light coming from? What should I remove from the frame?
That short pause changes everything. It stops you from snapping randomly and helps you build a cleaner image. A good photo usually has one clear idea. It may be a child laughing, a mountain view, a plate of food, or a quiet street corner. When the viewer knows where to look, the photo feels stronger.
This is one of the most useful photography tips for beginners with any camera because it works across every device. A phone camera and DSLR both improve when the person behind them makes better visual decisions.
Master Composition Without Making It Complicated
Composition means arranging everything inside the frame. You do not need to memorize complex rules. You only need to place your subject with intention.
Use the Rule of Thirds When the Center Feels Flat
Turn on grid lines in your camera or phone settings. You will see two vertical and two horizontal lines. Instead of placing your subject directly in the middle, place it along one of those lines or near an intersection.
This works well for portraits, landscapes, pets, food, and travel photos. For example, when photographing a friend near the ocean, place them on the left third and let the shoreline fill the rest. The image instantly feels more balanced.
Do not treat the rule of thirds as a law. Centered photos can look powerful too. Use the grid when your photo feels static or awkward.
Check the Edges Before You Shoot
The edges of the frame reveal beginner mistakes fast. I always scan the outer border before pressing the shutter.
Look for chopped-off feet, tilted horizons, trash cans, exit signs, awkward tree branches, and bright distractions. These small details pull attention away from the subject.
This one habit can make casual photos look more polished. It takes two seconds and saves you from editing headaches later.
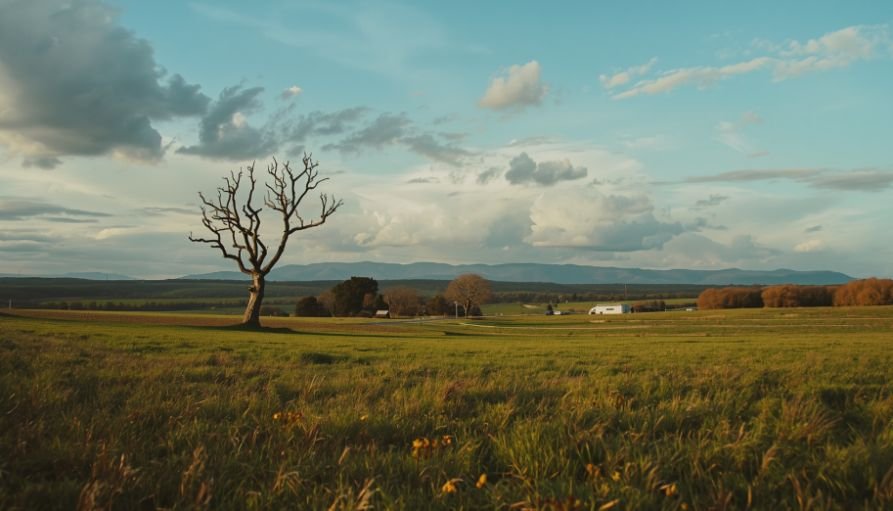
Use Leading Lines to Guide the Eye
Roads, fences, bridges, rivers, staircases, and hiking paths can pull the viewer into the image. These are called leading lines.
For travel shots, I like using a trail or road that starts near the bottom of the frame and points toward the main view. It gives the photo direction and depth.
Leading lines are especially useful for landscape photography because wide scenes can look flat without structure.
Work With Light Instead of Fighting It
Light can make an average subject look beautiful. Bad light can ruin a great subject.
Shoot During Golden Hour When Possible
Golden hour happens shortly after sunrise and shortly before sunset. The light is softer, warmer, and more flattering than midday sun.
For portraits, golden hour reduces harsh shadows under the eyes. For landscapes, it adds texture and color to mountains, fields, water, and buildings.
If I can choose the time, I rarely shoot important outdoor photos at noon. The light is usually too harsh and contrasty.
Use Cloudy Days for Softer Portraits
Many beginners think cloudy weather is bad for photos. It is often excellent.
Clouds act like a giant softbox. They spread sunlight evenly and reduce harsh shadows. This helps when photographing people, flowers, pets, cars, or street scenes.
If the sky looks dull, crop out most of it. Focus on faces, textures, colors, and details instead.
Clean Your Lens More Often Than You Think
A dirty lens can make photos look hazy, soft, or washed out. Smartphones are especially bad for this because they sit in pockets, bags, and hands all day.
Wipe the lens with a clean microfiber cloth before shooting. This is the least glamorous tip here, but it works instantly.
Change Your Perspective for More Interesting Photos

Most people take photos from eye level while standing. That is why many casual photos look the same.
Get Low for Kids, Pets, and Action
When photographing children or pets, crouch down to their eye level. This makes the photo feel more personal and less like an adult looking down.
For fast-moving kids, use Shutter Priority mode on a DSLR. Set the shutter speed around 1/500s for running and 1/1000s for sports or jumping. Turn on Auto ISO so the camera can keep the image bright.
Switch to Continuous Autofocus too. Canon calls this AI Servo, while Nikon and Sony often use AF-C. This helps the camera keep tracking a moving subject instead of locking focus once.
Try a Straight-Down View for Everyday Scenes
A bird’s-eye view can make simple objects look intentional. Try it with coffee, notebooks, shoes, food, flowers, or travel items on a hotel bed.
Keep the camera parallel to the surface. Watch the corners. Remove clutter before shooting.
This is one of my favorite basic photography tips for new photographers because it turns normal moments into clean, shareable images.
Move Closer Instead of Using Digital Zoom
Digital zoom often reduces image quality, especially on phones. If it is safe and practical, move your feet instead.
Getting closer removes distractions, strengthens facial expressions, and fills the frame with useful detail. It also helps when the background is messy.
For portraits, step closer until the person becomes the clear focus. For food, move close enough to show texture. For flowers, fill the frame with color and shape.
Use Simple Camera Settings That Actually Help

You do not need full manual mode to take strong photos. Beginner-friendly modes can do a lot of heavy lifting.
Once you are comfortable with beginner-friendly settings, you can take the next step by learning to use manual mode for better photos so you can control exposure, motion, and depth more intentionally.
Use Aperture Priority for Landscapes
For DSLR travel landscapes, switch to Aperture Priority mode. It is usually marked A or Av.
Set the aperture around f/8 or f/11 when you want more of the scene sharp. This works well for mountains, beaches, forests, city views, and national parks.
Keep ISO low, such as 100 or 200, when there is enough light. Low ISO helps reduce digital noise and keeps skies cleaner.
Use a single focus point and aim about one-third into the scene. Then add a foreground object, such as rocks, flowers, a fence, or a path. This creates depth and stops the image from looking flat.
Use Burst Mode for Action
Do not try to capture one perfect moment with one click. Use burst mode.
Burst mode takes multiple photos while you hold the shutter button. It is useful for kids running, pets jumping, waves crashing, sports, laughter, and candid moments.
Afterward, choose the frame with the best expression, sharpest eyes, and cleanest body position.
Tap to Focus on Smartphones
On a smartphone, tap your subject before taking the photo. This tells the camera where to focus.
Many phones also let you adjust brightness after tapping. Slide your finger up or down to brighten or darken the image.
This helps with backlit portraits, sunset shots, food photos, and indoor scenes near windows.
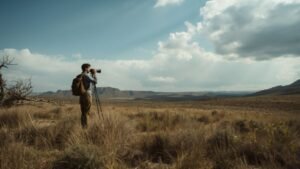
Pack Less Gear and Make Better Choices
New photographers often think better photos require more equipment. Too much gear can slow you down.
For casual shooting, I prefer a simple setup. A clean lens, charged battery, extra memory card, and small tripod are enough for most days.
For landscapes, a lightweight tripod helps during sunrise, sunset, and low-light scenes. A circular polarizing filter can reduce glare on water and make skies look richer.
For people who just bought a camera, the best first upgrade is not always a new lens. It is learning how shutter speed, aperture, ISO, and focus mode affect real photos.
That is why photography tips for people who just bought a camera should focus on practice, not shopping. Spend one week photographing the same subject in different light.
Shoot a tree in morning light, noon shade, golden hour, and cloudy weather. You will understand photography faster than by reading settings alone.
For creators who also record video or ambient sound during photo trips, audio noise cancelling technology can help you capture cleaner behind-the-scenes clips, interviews, and creator content without distracting background noise.
My 10-Second Photo Check Before Every Shot
Here is the original habit that improved my photos the most. Before I shoot, I do a 10-second check.
First, I clean the lens. Then I choose one clear subject. Next, I check the background and edges. After that, I look at the direction of light. Finally, I steady my hands and take more than one frame.
This sounds simple because it is. But it solves the most common beginner problems: blur, clutter, bad light, weak focus, and awkward framing.
Use this before portraits, landscapes, travel shots, product photos, and everyday snapshots. It works because it slows your brain down just enough to make better choices.
Common Beginner Mistakes That Make Photos Look Amateur
The biggest mistake is trying to fix every photo later. Editing helps, but it cannot fully rescue poor light, missed focus, or a distracting background.
Another mistake is always shooting from too far away. Distant subjects often look weak unless the background adds meaning. Move closer when the subject matters more than the scene.
Many beginners also ignore stability. Brace your elbows against your body. Lean on a wall. Use a railing. For slower shutter speeds, use a tripod.
Finally, avoid using flash automatically indoors. Window light often looks better. Move your subject near a window and turn off harsh overhead lights if possible.
FAQs
1. What are the easiest photography tips for beginners?
Use natural light, clean your lens, check the background, tap to focus, and move closer instead of relying on zoom.
2. What camera settings should new photographers learn first?
Start with shutter speed, aperture, ISO, focus mode, and exposure compensation before moving into full manual mode.
3. How can I take sharper photos of kids or pets?
Use 1/500s or faster, continuous autofocus, burst mode, and shoot from their eye level.
4. Are phone cameras good enough for beginner photography?
Yes, phone cameras work well when you use good light, clean composition, steady hands, and proper focus.
Your Camera Is Not the Drama, Your Habits Are
Better photos come from better habits, not expensive equipment. Start with light, framing, focus, and perspective before blaming your camera.
The next time you take a photo, do not rush the click. Clean the lens, choose the subject, check the edges, and move your feet. These easy photography tips for non professional photographers will make your images look sharper, cleaner, and more intentional with the camera you already own.


