A dark room, a glowing street, or a candlelit dinner can look magical to your eyes and messy on camera. I have missed enough sharp shots to know this: low light photography tips without flash only work when you control light, stability, focus, and noise together.
Flash can flatten a scene fast. It can also ruin natural shadows, skin tone, and mood. That is why I prefer using available light whenever possible. The goal is not to make night look like noon. The goal is to keep the atmosphere while getting a sharp, usable photo.
Why Low Light Photos Look Blurry Without Flash
Low light photography is not hard because your camera is weak. It is hard because the sensor needs enough light to record clean detail. When light is low, your camera has three choices: open the aperture, slow the shutter speed, or raise ISO.
Each choice has a cost. A wide aperture can reduce depth of field. A slow shutter speed can create blur. A high ISO can add grain. The best results come from choosing the least damaging option for the scene.
For me, the order is simple. Aperture first, shutter speed second, ISO last. That sequence keeps photos brighter without destroying sharpness too early.
Start With Aperture, Not ISO
Use Your Widest Aperture First
The fastest way to improve low-light photos is to let more physical light into the lens. Set your aperture to the lowest f-number your lens allows. That could be f/1.4, f/1.8, f/2.8, or f/3.5.
A 50mm f/1.8 lens is one of the best budget upgrades for low light. It gathers far more light than a basic kit zoom at f/3.5 or f/5.6. That extra light lets you use a faster shutter speed or lower ISO.
This matters more than camera brand. A slow lens on an expensive DSLR still struggles in dim rooms. A fast prime on a modest camera can look surprisingly clean.
Choose a Shutter Speed That Matches the Subject
Shutter speed controls motion. If your subject moves, stay around 1/125s or faster. For kids, pets, parties, or street scenes, I often start at 1/160s.
For still subjects, you can go slower. The old handheld rule says your shutter speed should be at least the reciprocal of your focal length. With a 50mm lens, try not to go below 1/50s handheld. With a 100mm lens, stay near 1/100s.
Image stabilization can help, but it does not freeze people. It only reduces camera shake. A stabilized lens will not stop a moving hand, turning face, or walking subject.
Raise ISO Last, But Do Not Fear It
ISO brightens the image digitally. Many beginners fear ISO 3200 or 6400, but a sharp noisy photo beats a clean blurry one.
I would rather shoot ISO 6400 with good exposure than ISO 1600 underexposed. When you brighten a dark file later, shadow noise gets ugly fast. A well-exposed high-ISO shot is often easier to clean during editing.
That mindset changed how I shoot. I stopped protecting low ISO and started protecting shutter speed.
Use Stability Before You Blame the Camera
Tripods, Walls, Tables, and Timer Tricks
If your subject is still, stabilize the camera before changing more settings. A tripod is best, but it is not the only option. I have used railings, tables, benches, car roofs, and street posts.
Use a 2-second timer or a remote shutter app. Pressing the shutter button can shake the camera at the worst moment. The timer gives the camera time to settle.
Burst mode also helps. Fire three to five frames. The middle shots often come out sharper because your hand relaxes after the first press.
DSLR Tip: Stop Mirror and Shutter Shock
DSLR cameras have a physical mirror inside. When you take a photo, that mirror flips up. In low light, tiny vibrations can soften the image, especially at slower shutter speeds.
Use Mirror Lockup if your DSLR has it. The first shutter press lifts the mirror. The second press takes the photo after vibration settles.
Live View also helps because it keeps the mirror up while you compose on the rear screen. Pair Live View with a 1 or 2-second exposure delay for sharper results. This is one of the most ignored low light photography tips without flash for DSLR users.
Find Better Ambient Light Before Changing Settings
Use Storefronts, Street Lamps, Windows, and Phone Screens
Low light does not mean no light. Before raising ISO, I move the subject closer to a useful light source.
Neon signs, restaurant windows, lamps, candles, computer screens, and storefront displays can all work. The trick is direction. Place the light in front of the subject or slightly to one side. Side light adds shape. Front light adds clean detail.
A phone screen can also save a portrait. Open a white screen, raise brightness, and hold it just outside the frame. It creates a soft glow without the harsh look of flash.
Avoid Backlighting Unless You Want a Silhouette
Backlighting looks dramatic, but it can fool your camera. If the brightest light is behind the subject, faces often turn dark.
For cleaner results, rotate the subject toward the strongest available light. Even a small change in angle can improve skin tone, focus, and shadow detail.
If you want a silhouette, expose for the bright background. If you want facial detail, expose for the face.
Focus Smarter in Dark Scenes
Use High-Contrast Edges
Autofocus needs contrast. In the dark, cameras struggle when you aim at plain walls, dark clothing, or soft shadows.
Aim the center focus point at a clear edge. Good targets include a bright sign against a dark wall, glasses frames, eyelashes, jewelry, or the line between a face and background. Lock focus, then recompose.
On DSLRs, the center autofocus point is often the most reliable. I use it first in dim scenes before trusting outer points.
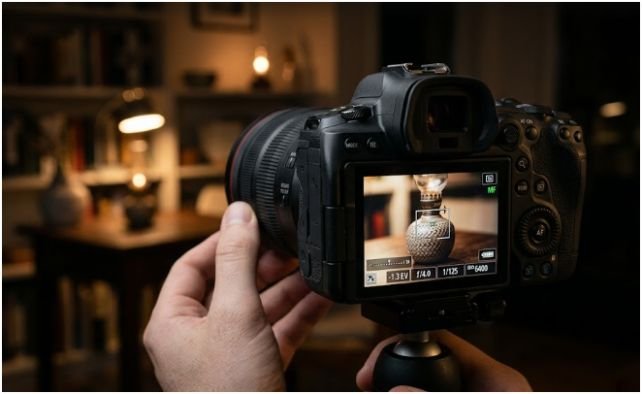
Switch to Manual Focus With Live View Magnification
When autofocus hunts back and forth, stop fighting it. Switch the lens to manual focus. Turn on Live View, magnify the display to 5x or 10x, and rotate the focus ring until details look crisp.
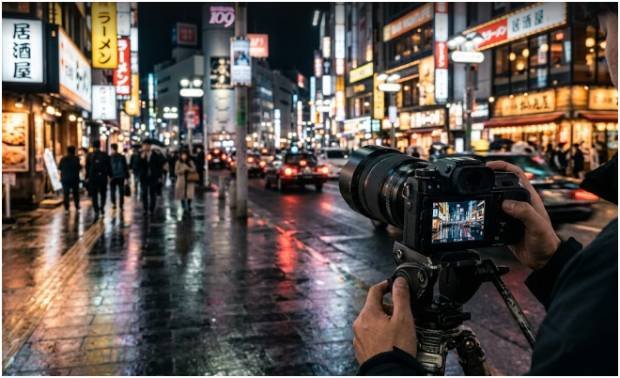
This works well for night city shots, food photography, interiors, product photos, and still portraits. It feels slower at first, but it saves ruined frames.
If you use an external speedlight, you may also use its autofocus assist beam while disabling flash output. That helps the lens lock focus without lighting the final image.
Expose Brighter for Cleaner Shadows

Why ETTR Works in Low Light
ETTR means “Expose to the Right.” It means pushing the histogram slightly toward the right side without clipping important highlights.
This matters because shadow recovery creates noise. If you underexpose and brighten later, you pull grain and color artifacts out of the darkest areas. A brighter file often edits cleaner.
Do not blow out faces, lamps, or bright signs. Watch the histogram and highlight warning. The goal is controlled brightness, not washed-out images.
My Tested Low-Light Starting Setup
When I shoot handheld at night, my starting point is usually simple: f/1.8, 1/125s, Auto ISO capped around 6400, RAW format, and burst mode.
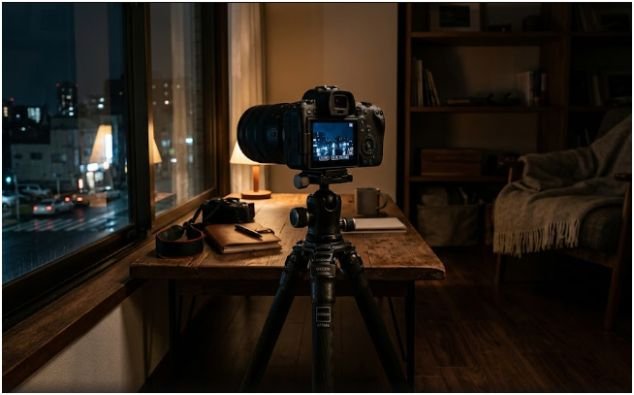
For static scenes, I change the setup. I use a tripod or stable surface, ISO 100 to 800, aperture around f/5.6 if I need depth, and a slower shutter speed. Then I use a timer.
My original field rule is this: if the photo looks slightly too dark on the screen, I raise exposure by one stop before shooting again. In testing, that one-stop brighter file usually gives me cleaner shadows than a darker file repaired later.
This is one of the most practical low light photography tips without flash because it prevents a common editing mistake.
Shoot RAW and Fix Noise the Right Way
RAW gives you more editing room than JPEG. It keeps more shadow and highlight information, which matters in dim scenes.
I shoot RAW whenever the light is difficult. Then I adjust white balance, lift shadows carefully, reduce noise, and sharpen the subject. Modern denoise tools can clean high ISO grain while keeping useful detail.
Do not erase all grain. A little texture can look natural. Over-smoothed photos often look plastic, especially on skin.
The better approach is simple. Expose well, keep the camera steady, focus carefully, and use denoise as a finishing tool, not a rescue plan.
Final Frame: No Flash, No Panic
Flash is not the boss of night photography. Once I learned to control aperture, shutter speed, ISO, focus, and ambient light, my low-light photos stopped looking accidental.
Start with the widest aperture. Protect shutter speed. Stabilize your camera. Find better light. Shoot RAW. If you use a DSLR, add Live View, Mirror Lockup, and manual focus magnification to your routine.
The next time the room gets dark, do not rush to pop up the flash. Move toward the light, steady your hands, and make the mood work for you to take sharp photos in natural light.
FAQs
1. What settings are best for low light photography without flash?
Start with f/1.8 or f/2.8, use 1/125s for people, then raise ISO until the image is bright enough.
2. How do I take sharp photos at night without a tripod?
Use a wide aperture, image stabilization, burst mode, a faster shutter speed, and support your elbows against your body.
3. Is high ISO bad for low light photography?
No. High ISO is better than motion blur or heavy underexposure, especially when you shoot RAW and denoise later.
4. How do DSLR users avoid blur in low light?
Use Live View, Mirror Lockup, exposure delay, center-point autofocus, or manual focus with 5x or 10x magnification.