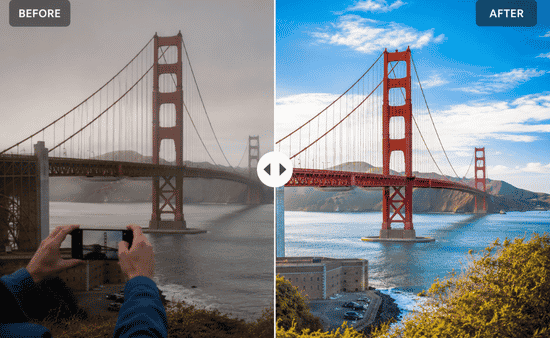
Indoor photography tips for beginners without studio lights start with one simple truth: your room already has better light than you think. The real problem is usually mixed bulbs, messy backgrounds, weak camera settings, and letting the camera make every decision.
I learned this the hard way. My early indoor photos looked yellow, flat, and soft, even beside a big window. Once I stopped chasing “perfect light” and started controlling available light, my photos changed fast.
Start With the Light You Already Have
Good indoor photography is not about making the room brighter. It is about choosing one light source and removing the rest.
Use Windows Like Softboxes
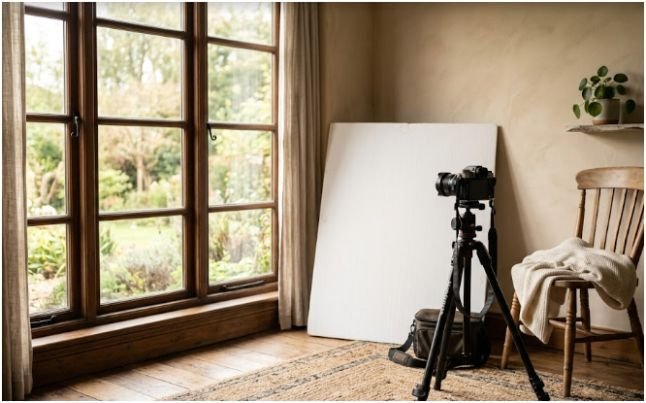
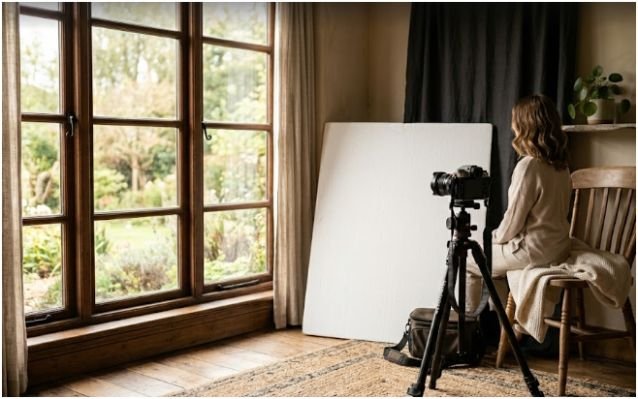
A large window is the cheapest softbox you will ever own. Place your subject close to the window, but avoid direct sunlight unless you want hard shadows. Soft window light wraps around the face and makes skin look smoother.
Do not place the subject facing the window straight on every time. Turn them slightly. A 45-degree angle gives the face shape. A 90-degree angle creates a dramatic side-lit look.
When I shoot indoor portraits, I first look for the brightest window, then I turn my subject until one side of the face has light and the other side has soft shadow. That small move makes the photo feel intentional.
Turn Off Competing Room Lights
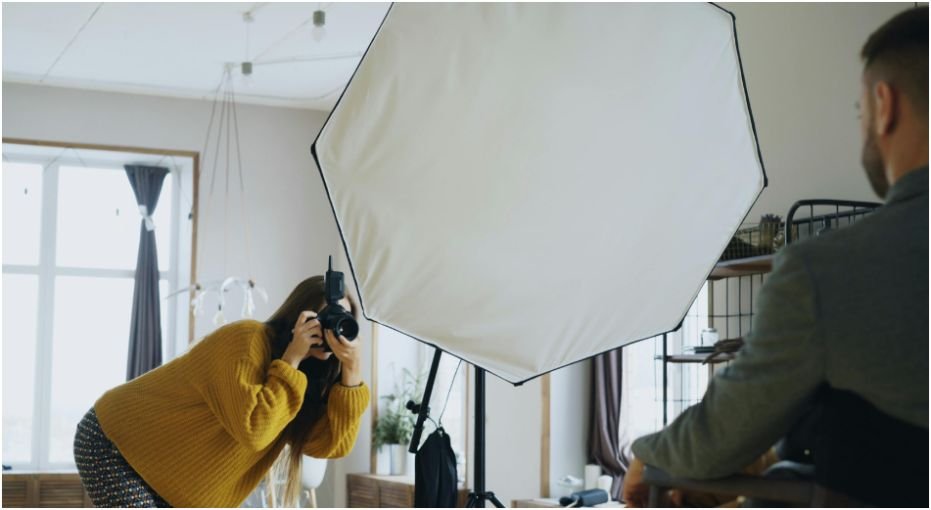
Overhead bulbs often ruin indoor photos. Many household lights are warm yellow, while daylight from a window is cooler. When both hit the subject, the camera struggles with white balance.
That is why faces can look orange on one side and blue on the other. Turn off ceiling lights, lamps, and TV glow. Use one main light source whenever possible.
If the room still feels too dark, move the subject closer to the window instead of switching on every light.
Move the Subject Away From the Background
Distance creates depth. Move your subject 2 to 3 metres away from the background wall when the room allows it. The background becomes darker, softer, and less distracting.
This trick works especially well in small apartments. You do not need a studio backdrop. You just need separation between the subject and the wall.
Camera Settings That Save Indoor Photos
Indoor light is weaker than outdoor light, so your camera needs help. The exposure triangle matters here: aperture, shutter speed, and ISO.
Open the Aperture First
Use a wide aperture such as f/1.8, f/2.0, or f/2.8 if your lens allows it. A lower f-number lets more light into the camera. It also gives you background blur, which helps hide clutter.
For portraits, focus carefully on the eye closest to the camera. Wide apertures look beautiful, but they can miss focus if the subject moves.
Phone users can use Portrait mode, but standard Photo mode is often better in tricky light because it reacts faster.
Raise ISO Before You Risk Blur
Beginners often fear ISO because it adds grain. I would rather have a sharp grainy photo than a clean blurry one.
Noise can be reduced in editing. Motion blur is much harder to fix. Raise ISO when the shutter speed drops too low. On many modern cameras, ISO 800, 1600, or even 3200 can still look usable indoors.
Think of ISO as a safety tool, not a mistake.
Keep Shutter Speed Fast Enough
For handheld indoor portraits, stay around 1/120s or faster when possible. For still objects, you can go slower if your hands are steady or the camera has stabilization.
For kids, pets, or people talking, use a faster shutter speed. Movement creates blur even if your camera is perfectly still.
If you are photographing food, books, decor, or products, place the camera on a tripod, table, or stack of books. Then you can use a slower shutter speed without shake.
My One-Window Indoor Portrait Setup
This is the setup I use when I want fast results in an ordinary room.
The Simple Placement Formula
I place the subject near a window, then turn them slightly away from it. I turn off every other light. Then I move them away from the wall until the background starts to fall darker.
The camera stands opposite the subject, not directly in front of the window. This keeps the photo from looking flat.
My quick formula is simple: window beside the subject, camera across from the face, background behind the subject.
Use a DIY Reflector
A white poster board can change everything. Place it on the shadow side of the subject, opposite the window. It bounces light back into the face and softens harsh contrast.
You can also use a white bedsheet, foam board, or a pale wall. Silver reflectors add stronger light, but white reflectors look more natural for beginners.
Start with the reflector close to the face. Move it away if the shadows become too flat.
For more camera exposure understand how to do low light photography without flash and connect those settings with this window-light method.
Try Burst Mode for Sharper Results
Burst mode is underrated indoors. When you shoot handheld, tiny movements happen between frames. A burst gives you several versions, and one is usually sharper than the rest.
I use burst mode when shooting portraits near windows, especially if the subject is laughing, turning, or blinking. It is not lazy shooting. It is smart insurance.
Dark and Moody Indoor Portraits With an iPhone
The iPhone often tries to brighten shadows. That helps casual snapshots, but it can ruin a dark editorial look.
Use Side Light for a Chiaroscuro Look
For a moody portrait, place the subject at a 90-degree angle to the window. The window should light one side of the face while the other side falls into shadow.
Keep the background dark. Move the subject away from the wall. Close blinds or curtains on other windows. The less light reaches the background, the richer it looks.
This creates a chiaroscuro effect, which means strong contrast between light and dark.
Lock Exposure on the Bright Side
On an iPhone 15 Pro, use the 3x lens for portraits when you have enough room. It compresses the face nicely and removes background clutter.
Tap and hold on the bright side of the face until AE/AF LOCK appears. Then drag the sun slider down. Watch the background, not just the face. Stop when the background looks deep and dramatic while the lit side of the face stays visible.
This is how you stop the phone from making the whole room look gray.
Turn Off Night Mode for Drama
Night Mode can brighten shadows automatically. That is useful for detail, but not for a moody editorial portrait.
If the yellow Night Mode icon appears, tap it and turn it off. Hold the phone steady, lower the exposure, and keep the shadows dark.
The goal is not a bright room. The goal is controlled contrast.
Composition Tips for Better Indoor Photos
Lighting gets attention first, but composition decides whether the image feels finished.
Clean the Background With Light
You do not always need to clean the whole room. You can hide clutter by controlling light.
Close blinds halfway. Move the subject into brighter light and let the background stay darker. Use a wide aperture to blur furniture, shelves, and small distractions.
A clean indoor photo often comes from selective lighting, not a perfect home.
Use Negative Space
Negative space works beautifully indoors. Place your subject on one side of the frame and leave the other side darker and emptier.
This is powerful for editorial portraits, maternity photos, musician shots, and creative profile images. The empty space gives the image mood.
Use the rule of thirds, but do not follow it like a prison sentence. Place the face where the light feels strongest.
Make the Subject Look Away From the Light
Ask the subject to look slightly into the darker side of the room. This can create a thin rim of light along the jaw, nose, or cheek.
It feels more mysterious than a direct smile at the camera. It also helps beginners make portraits that look less like quick phone snapshots.
Common Indoor Photography Mistakes Beginners Make
The biggest mistake is mixing too many lights. Pick one source first.
The second mistake is using a shutter speed that is too slow. If people look soft, raise ISO or open the aperture before blaming the camera.
The third mistake is standing too far from the window. Indoor light fades quickly. Move closer before changing every setting.
The fourth mistake is letting the background receive the same light as the subject. If the subject and background are equally bright, the photo looks flat.
The fifth mistake is trusting auto mode in every room. Auto mode wants balance. Creative indoor photography often needs imbalance, shadow, and contrast.
FAQs
1. How do I take indoor photos without studio lights?
Use a window as your main light, turn off overhead bulbs, place the subject near the window, and adjust aperture, ISO, and shutter speed.
2. What camera settings are best for indoor photography?
Start with a wide aperture, keep shutter speed around 1/120s for people, and raise ISO when the photo becomes too dark.
3. How can I make indoor photos look less yellow?
Turn off warm household bulbs and use one light source. Set white balance manually if your camera allows it.
4. Can I take good indoor portraits with an iPhone?
Yes. Use window side light, lock AE/AF on the bright side of the face, lower exposure, and turn off Night Mode for mood.
Final Take: Your Room Is Not the Problem
Your room is not boring. Your light just needs a boss.
Indoor photography tips for beginners without studio lights work best when you stop adding random light and start shaping the light already there. Use one window. Kill the overhead bulbs. Move the subject away from the wall. Open the aperture. Raise ISO when needed. Lock exposure when your phone gets too helpful.
Try one setup today: subject beside a window, background several feet behind, white board on the shadow side, and exposure lowered slightly. That one small setup can make an ordinary room look like a quiet editorial studio.