The fastest way to ruin a golden hour portrait is to treat the light like it stays the same. It does not. These golden hour photography tips for better portraits will help you control direction, exposure, lenses, and background glow before the sun disappears.
Golden hour looks soft, warm, and forgiving, but it changes every few minutes. I have learned this the hard way during beach sessions, field portraits, and outdoor family shoots where the best light lasted less than expected. The difference between a flat photo and a glowing portrait often comes down to where you place your subject and how quickly you adjust.
Why Golden Hour Changes Portraits So Fast
Golden hour happens shortly after sunrise or before sunset, when the sun sits low in the sky. That low angle creates warmer tones, longer shadows, and softer contrast than harsh midday light. For portraits, this means smoother skin, glowing hair, and backgrounds that look more cinematic.
The challenge is speed. The light drops quickly, especially during evening sessions. A camera setting that works at 6:30 may feel too dark by 6:45. That is why I never shoot golden hour portraits on autopilot. I start with a plan, then adjust every few minutes.
Plan the Portrait Session Before the Light Peaks
Good golden hour portraits start before the camera comes out. I like to arrive early, look at the sun’s direction, and decide where I want the background glow to appear.
Scout the Background Before the Subject Arrives
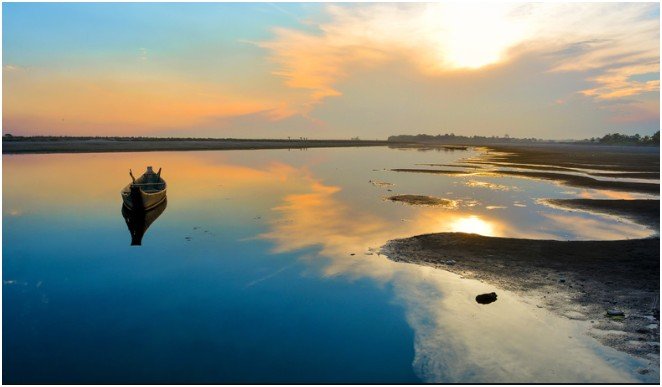
For outdoor portraits, I look for trees, tall grass, open fields, water, fences, or building edges that can catch warm light. A plain background can work, but golden hour looks better when light hits texture.
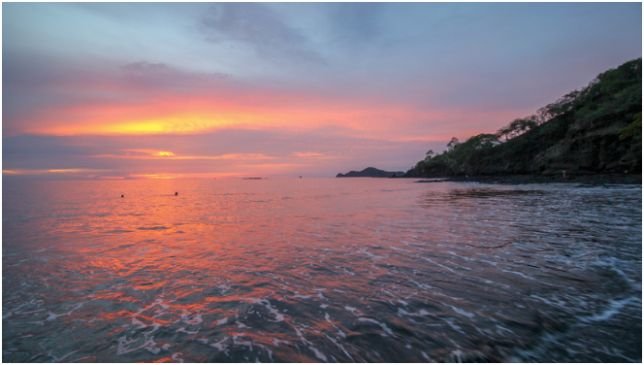
At the beach, I avoid placing the subject too close to bright water unless I want a high-key look. In fields, I check where grass or plants might create messy distractions behind the face. If I am shooting in a park, I look for open shade with a bright background.
Use the 10-Minute Light Shift Method
My favorite golden hour trick is simple. Every 10 minutes, I change one thing: subject angle, camera height, lens choice, or exposure. This keeps the session fresh while the light changes.
Early in golden hour, I often use side light because the sun is still strong. In the middle, I switch to backlighting for rim glow. Near the end, I move closer and shoot tighter portraits because the background becomes softer and darker.
This small routine prevents rushed decisions and gives the gallery more variety.
Position Your Subject for Flattering Golden Hour Light
Subject placement matters more than the camera body. The same sunset can look harsh, dreamy, or dramatic depending on the angle.
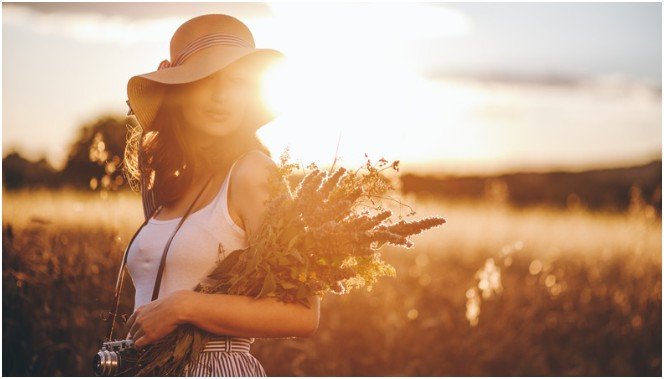
Backlighting for a Soft Rim Glow
For backlighting, place the sun behind your subject. This creates a glowing edge around the hair, shoulders, and clothing. It works beautifully for senior portraits, maternity photos, engagement sessions, and beach portraits.
The biggest mistake is putting the sun directly in the lens. That can wash out contrast and make focus harder. I usually angle slightly to the side so the light skims the subject instead of blasting the camera.
Front Lighting Without Squinting
Front lighting means your subject faces the sun. This can create rich color and even skin tones, but timing matters. If the sun is still bright, your subject may squint or look uncomfortable.
I save front lighting for the later part of golden hour, when the sun feels softer. I also ask the subject to close their eyes between shots, then open them right before I click.
Side Lighting for Depth and Shape
Side lighting places the subject at about a 90-degree angle to the sun. This adds shape to the face and creates soft shadows across the cheekbones, jawline, and clothing.
I use side lighting when I want portraits to feel more editorial. It works well in fields, city streets, and open parks where the sun can move across the face instead of hitting it straight on.
Best Camera Settings for Golden Hour Portraits
Camera settings should protect sharpness first. A blurry golden portrait is still a missed shot.
Aperture, Shutter Speed, and ISO
For portraits, I often start between f/1.8 and f/2.8. A wide aperture creates soft background blur and separates the subject from busy grass, trees, or beach details.
I keep shutter speed fast enough to freeze movement. For still portraits, I prefer staying around 1/250 or faster. If the subject is walking, laughing, or turning, I raise it more.
As the light fades, I raise ISO before I let shutter speed get too slow. Modern cameras handle ISO 1600 or 3200 better than many beginners expect. Sharp grain usually looks better than a clean but blurry face.
White Balance and RAW Format
Auto white balance can reduce the warm tone that makes golden hour special. I prefer Shade or Cloudy white balance when I want warmer color straight from the camera.
I also shoot RAW. RAW files hold more editing flexibility, especially when the face is darker than the sky. This helps recover shadows, soften highlights, and fine-tune skin tones later.
Control Exposure Without Losing the Glow
Golden hour portraits often include a bright sky and a darker face. Your camera may struggle to balance both.
Expose for Highlights First
When I shoot into the sun, I expose for the brightest part of the scene. I do not want the sky to turn pure white unless that is the creative goal.
The face may look slightly dark in-camera, but I can lift shadows later. Blown highlights are harder to fix. This is one reason RAW matters so much for sunset portraits.
Use Reflectors and Open Shade
A reflector can save a backlit portrait. A white reflector gives soft fill, while a silver reflector creates stronger brightness. I place it below or beside the subject to bounce light into the eyes.
Open shade also works well. Place your subject near the edge of shade from a tree, wall, or building. The face stays smooth while the background still catches golden light.
If you also shoot portraits indoors, the same light-control mindset applies. You can use the internal anchor indoor photography tips for beginners without studio lights when explaining how natural light works inside.
Best DSLR Portrait Lenses for Beaches and Fields
Wide-open spaces need lenses that handle both scale and compression. I usually choose between three classic portrait options.
50mm Prime Lens
A 50mm prime lens, often called the nifty fifty, is affordable, lightweight, and sharp. Many versions open to f/1.8 or f/1.4, which creates soft blur behind the subject.
I like the 50mm for half-body and full-body portraits. It works well when I want to show more of the beach, field, or sky without making the subject feel tiny.
85mm Prime Lens
The 85mm lens is a portrait favorite for a reason. It creates flattering facial proportions and compresses the background beautifully.
At sunset, that compression can make the sun look larger behind the subject. It also helps remove clutter from the frame. If I want a clean, emotional portrait, I often reach for the 85mm first.
24-70mm f/2.8 Zoom Lens
A 24-70mm f/2.8 lens is the practical choice when I need flexibility. At 24mm, I can capture the sky, landscape, and movement. At 70mm, I can shoot tighter portraits without changing lenses.
This lens is helpful when the light is changing quickly or the subject is moving through different backgrounds.
Small Gear Choices That Save Golden Hour Portraits
Golden hour does not require a huge gear bag. A few small accessories can make a major difference.
Lens Hoods
I always use a lens hood outdoors. In open fields and beaches, light can hit the front glass from different angles. That stray light can cause flare, haze, and low contrast.
A lens hood helps protect contrast while still allowing creative glow when you want it.
Neutral Density Filters
Wide apertures let in a lot of light. On a bright beach, your camera may hit its fastest shutter speed before the exposure looks right.
A neutral density filter darkens the scene without forcing you to close the aperture. This lets you keep creamy background blur even when the sun is still strong.
FAQs About Golden Hour Portrait Photography
1. What is the best time for golden hour portraits?
The best time is usually within the hour after sunrise or the hour before sunset, but exact timing changes by season and location.
2. What aperture is best for golden hour portraits?
An aperture between f/1.8 and f/2.8 works well for soft background blur and strong subject separation.
3. Should I use flash during golden hour portraits?
You can, but a reflector or open shade often gives a softer natural look for beginners.
4. What lens is best for golden hour photography tips for better portraits?
A 50mm is great for full-body shots, while an 85mm is better for flattering close portraits and background compression.
Final Glow-Up: Don’t Waste the Best Light
Golden hour rewards photographers who move with the light instead of fighting it. I start with the sun’s direction, choose the right lens, protect highlights, and adjust every few minutes.
The best next step is simple: pick one location, arrive early, and shoot the same subject with backlight, front light, and side light. That one practice session will teach you more than guessing your way through the sunset.