You can take sharp, dramatic night photos with a beginner DSLR. You do not need a $3,000 camera or a bag full of lenses. You need control, patience, and the right settings.
These night photography tips for beginners with DSLR are based on what actually helps when the light drops. Auto mode often panics at night. It raises ISO too high, misses focus, and gives you blurry images. Manual mode fixes that because you control aperture, shutter speed, and ISO yourself.
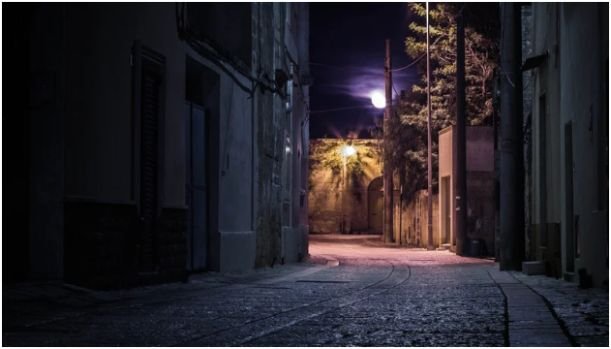
Why Night Photography Feels Hard on a DSLR
Night photography feels difficult because your camera sees less light than your eyes. Your eyes adjust naturally. Your DSLR needs more time, a wider aperture, or a higher ISO.
That is why blurry photos are so common at night. The shutter stays open longer, and even a tiny hand movement can ruin the shot. Noise also becomes more visible when ISO climbs too high. Focus gets harder because autofocus needs contrast, and dark scenes do not give it much help.
Once I understood that night photography is mostly about stability and exposure, my results improved fast. I stopped blaming the camera and started building each shot with intention.
Best DSLR Gear for Night Photography Beginners
You can start with the DSLR and kit lens you already own. A basic 18-55mm lens works for city lights, streets, bridges, storefronts, and simple night scenes. A fast prime lens helps, but it is not required on day one.
A Tripod Matters More Than a New Camera
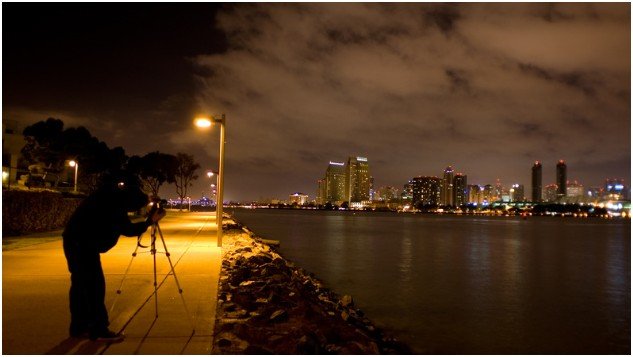
A sturdy tripod is the first serious upgrade I recommend. Night photos often need shutter speeds between 5 and 30 seconds. You cannot handhold that, no matter how steady you feel.
Place the tripod on firm ground. Avoid thin railings, shaky bridges, and windy corners. If your tripod has a center column, keep it low. A lower tripod usually handles vibration better.
The Small Accessories That Save a Night Shoot
A remote shutter release helps prevent camera shake. If you do not have one, use your DSLR’s 2-second timer. That short delay lets the camera settle after you press the shutter.
Carry spare batteries because long exposures and cold air drain power quickly. A lens hood also helps block flare from streetlights, signs, and passing cars. I also keep a microfiber cloth nearby because night air can leave moisture on the lens.
Best Camera Settings for Night Photography With a DSLR
Good settings depend on the scene, but beginners need a reliable starting point. These night photography tips for beginners with DSLR work well for city streets, light trails, buildings, and general low-light scenes.
Shoot RAW for Better Night Edits
Set your file format to RAW. Night photos often have strong color casts from streetlights, neon signs, car headlights, and storefronts. RAW files give you more room to fix white balance, recover shadows, and reduce noise later.
JPEG can look fine straight from the camera, but it gives you less flexibility. At night, that flexibility matters.
Use Manual Mode Instead of Auto
Turn the mode dial to Manual, marked as M. This gives you full control over the exposure triangle.
Aperture controls how much light enters the lens. ISO controls sensor sensitivity. Shutter speed controls how long the camera collects light. Night photography depends on balancing all three.
Start With These DSLR Night Photography Settings
For a basic night city scene, I start at ISO 800, aperture f/3.5, and shutter speed 10 seconds. If the photo looks too dark, I slow the shutter to 15 or 20 seconds. If it looks too bright, I lower ISO or shorten the shutter speed.
For light trails, I usually use ISO 100 or 200, aperture f/8 or f/11, and shutter speed around 10 to 20 seconds. The smaller aperture keeps bright lights controlled while the long shutter turns moving cars into glowing lines.
For handheld night street shots, use the widest aperture your lens allows and raise ISO carefully. Try ISO 1600 or 3200 only when you cannot use a tripod.
How to Focus a DSLR at Night
Focus is where many beginner night photos fail. A photo can have perfect exposure and still look bad if the focus is soft.
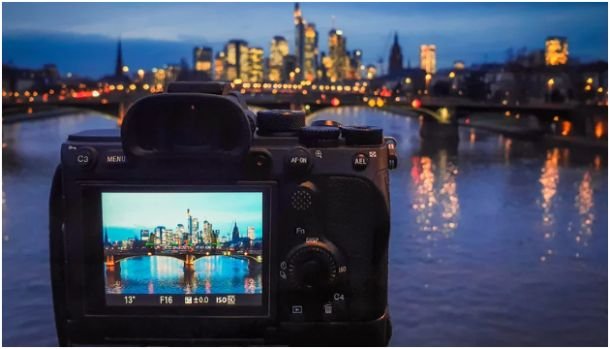
Use Live View and a Bright Distant Light
Switch to Live View. Find a bright distant light, such as a streetlamp, building sign, or lit window. Zoom in digitally on your screen, then turn the lens focus ring until that light becomes a small sharp point.
After that, do not touch the focus ring. You can recompose carefully, but keep the focus locked.
Do Not Trust Autofocus in the Dark
Autofocus often struggles at night because it needs contrast. In dark scenes, it may hunt back and forth or lock onto the wrong subject.
Manual focus gives you control. If your lens has a focus switch, move it from AF to MF. This one change can save an entire night shoot.
Simple Night Photography Ideas to Try First
You do not need a dramatic skyline to practice. Start with places that already have interesting light.
City Light Trails
Find a safe sidewalk near moving traffic. Set your tripod away from the road. Use Manual mode, ISO 100, f/8, and a 10-second shutter speed.
Cars become red and white streaks. Wet roads make the effect even better because they reflect light. Avoid standing in unsafe spots just to get a better angle.
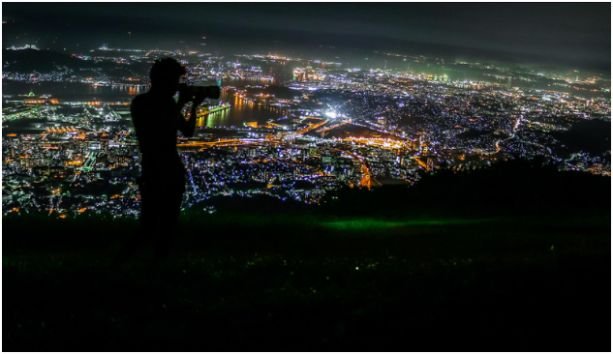
Street Scenes With Strong Light
Look for contrast. A glowing diner window, a gas station canopy, a theater sign, or a quiet streetlamp can create mood.
Do not aim only at the brightest object. Include darker areas too. Night photos need shadows because shadows create shape.
Night Sky Practice Shots
For basic night sky practice, use a tripod, wide aperture, and manual focus. Start with ISO 1600, f/3.5, and a shutter speed around 15 seconds.
If stars look like short lines, reduce the shutter speed. A wider lens helps keep stars sharper because it hides movement better.
If you also enjoy outdoor shooting during the day, I recommend pairing this skill with wildlife photography tips for beginner photographers. Both styles teach patience, timing, and careful observation.
My 15-Minute Beginner Night Shoot Workflow
Here is the simple workflow I use when teaching beginners. First, I set the camera on a tripod and frame the shot. Then I switch to RAW, Manual mode, and manual focus.
Next, I set ISO 800, the widest aperture, and a 10-second shutter. I use Live View to focus on a bright distant light. Then I turn on the 2-second timer and take one test photo.
I check three things only: sharpness, brightness, and blown highlights. If the image is blurry, I fix focus or tripod stability. If it is too dark, I slow the shutter. If bright signs look white and empty, I lower ISO or shorten the exposure.
This process works because it removes guessing. You make one change at a time instead of spinning every dial in frustration.
Common DSLR Night Photography Mistakes to Avoid
The biggest mistake is shooting handheld with slow shutter speeds. If your shutter is slower than 1/30 second, camera shake becomes likely. For multi-second exposures, a tripod is non-negotiable.
Another mistake is pushing ISO too high too soon. High ISO can help, but it also adds noise. Use shutter speed first when your camera is on a tripod.
Many beginners also forget to check focus. The image may look sharp on the small camera screen, then look soft on a laptop. Zoom in during review before leaving the location.
Do not overuse your camera’s screen brightness either. A bright LCD can fool you into thinking an underexposed photo looks fine. Check the histogram if your DSLR offers it.
Editing Night Photos Without Making Them Look Fake
Good night editing starts with restraint. I usually lower highlights first, especially around signs, streetlights, and headlights. Then I lift shadows slightly, but not too much. Night should still feel like night.
White balance matters because artificial lights can turn photos orange, green, or purple. RAW files help you correct those colors without destroying the image.
Use noise reduction gently. Too much noise reduction makes buildings, roads, and skies look smeared. Add a little sharpening after noise reduction, but avoid crunchy edges.
FAQs About Night Photography Tips for Beginners With DSLR
1. What is the best ISO for night photography on a DSLR?
Start with ISO 400 to 1600, then raise it only when you cannot use a longer shutter speed.
2. What shutter speed should beginners use for night photography?
Use 5 to 30 seconds on a tripod, depending on how dark the scene is.
3. Can I take night photos with an 18-55mm kit lens?
Yes, a kit lens works well for city lights, light trails, buildings, and beginner night scenes.
4. Why are my DSLR night photos blurry?
Most blurry night photos come from camera shake, missed focus, or using shutter speeds that are too slow handheld.
The Night Is Not the Problem, Your Settings Are
Night photography gets much easier when you stop fighting the dark. Put your DSLR on a tripod, shoot RAW, use Manual mode, focus carefully, and test one setting at a time.
The best part is that night scenes reward patience. A normal road becomes a trail of light. A quiet storefront becomes a mood. A basic DSLR suddenly feels more powerful.
Start with one safe location, one tripod, and one 10-second exposure. That single photo will teach you more than another hour in Auto mode.